The Core Differences Between Cabin and Engine Air Filters
Every modern automobile relies on two distinct air filters that perform completely separate jobs. The engine air filter protects the mechanical heart of your car by trapping road grit, sand, and organic debris before fresh air enters the intake manifold and combustion chambers. In contrast, the car cabin filter cleans the outdoor air pulled into the passenger compartment through your heating, ventilation, and air conditioning vents, shielding you and your passengers from dust, pollen, and exhaust fumes.
Confusing these two components is common because owners often hear technicians mention an air filter change during routine fluid inspections. While both filters utilize pleated fiber or synthetic media to capture airborne particles, they reside in different locations and exhibit distinct wear characteristics. A blocked intake filter starves your motor of necessary oxygen, whereas a clogged auto cabin air filter strains your blower motor, slows down window defogging, and circulates unpleasant odors throughout the vehicle.
Understanding which component requires attention prevents unnecessary shop expenses and keeps your vehicle operating smoothly. Addressing regular vehicle air filter replacement ensures that your engine breathes clean air for efficient fuel combustion while your cabin climate system operates quietly and delivers fresh, odor-free air during daily commutes.
How Cabin Air Filters Protect Interior Air Quality and HVAC Systems
Your auto cabin air filter acts as the primary respiratory defense for everyone riding inside the vehicle. As your ventilation system pulls in exterior air from the cowl near the base of the windshield, this pleated barrier catches tree pollen, mold spores, brake dust, and fine soot before the air reaches your dashboard vents. Drivers with seasonal allergies or asthma typically notice immediate irritation when a filter becomes loaded with organic matter and road particulate.

Beyond health benefits, a clean replacement cabin air filter preserves the mechanical health of your heating and air conditioning assembly. When layers of dirt, dried leaves, and road grime accumulate across the pleats, the airflow becomes severely restricted, forcing the electric blower motor to work against heavy resistance. Over time, that added strain can cause the motor resistor to overheat or lead to premature blower failure, resulting in expensive dashboard repairs.
Restricted airflow also reduces the performance of your defroster during rainy or winter conditions, leaving humidity trapped against the inside of the windshield. Scheduling a routine replace cabin filter service or doing it yourself prevents moisture retention, stops stale mildew odors from taking root in the ductwork, and pairs naturally with regular visits to interior car detailing specialists who sanitize your carpets and trim.
What Engine Air Filters Do for Performance and Fuel Economy
Internal combustion engines consume thousands of gallons of air for every gallon of gasoline burned during standard driving. The engine air filter sits inside a sealed plastic housing near the intake duct to ensure that airborne abrasives never contact sensitive cylinder walls, piston rings, or mass airflow sensors. If abrasive dust bypasses this barrier, it acts like liquid sandpaper inside the cylinders, rapidly wearing metal tolerances and contaminating engine oil.
As an engine intake filter loads up with dirt, engine air filter replacement becomes essential to prevent sluggish throttle response. Modern engine computers can adjust fuel trim to compensate for restricted airflow, but a suffocated intake still robs the powertrain of top-end horsepower and torque during hard acceleration. Drivers often perceive this restriction as a hesitant transmission downshift or a lack of passing power when merging onto high-speed highways.
On older carbureted vehicles, a dirty filter directly ruined gas mileage by creating an overly rich fuel mixture, whereas modern fuel-injected cars typically suffer from reduced engine responsiveness rather than massive fuel economy drops. Even so, performing an auto air filter replacement on the intake side guarantees that your electronic control unit maintains the correct stoichiometric air-fuel balance under heavy towing, hill climbing, or aggressive acceleration.
Typical Replacement Intervals and When to Check Early
Automakers generally suggest changing cabin air filter elements every 15,000 to 25,000 miles, while the intake filter often carries a service recommendation between 15,000 and 30,000 miles. However, these figures serve only as general baselines because local driving conditions dictate how fast the filter media fills with contaminants. Drivers living on unpaved gravel roads or in arid desert regions may need to replace air filter components twice as often as city drivers.
Environmental factors like heavy urban traffic, construction zones, seasonal wildfire smoke, and dense spring pollen blooms drastically shorten service lifespans. During wildfire seasons, airborne ash can pack the folds of an exterior intake in just a few thousand miles of highway driving. Similarly, parking frequently beneath shedding pine or oak trees causes small needles and seed pods to lodge directly inside the intake cowl, restricting ventilation before mileage targets arrive.
Rather than relying strictly on the odometer, inspecting both filters at least once a year provides a realistic assessment of their condition. Many drivers find it convenient to inspect the filter media whenever they rotate their tires or inspect brakes. Taking five minutes for a quick visual check prevents driving with completely choked elements that degrade heating, cooling, or engine efficiency.
Inspecting Your Filters: Visual Signs of Wear
A proper visual inspection requires physically removing the filter element from its housing rather than merely glancing at the edges. When you examine a car cabin air filter, spread the pleats gently with your fingers to look down into the valleys where heavy debris collects. If you discover dense mats of pet hair, dead insects, pine needles, or dark gray soot embedded deep within the folds, the media has reached the end of its useful lifespan.
For the intake side, the daylight inspection test offers a reliable way to gauge contamination levels on paper media. Hold the filter up toward the sun or a bright workshop light and look through the clean downstream side toward the dirty face. If light passes easily through the paper folds, the filter still allows adequate airflow, but if the light is completely blocked by dark gray dirt and soot, a change engine air filter procedure is overdue.
You should also examine the integrity of the flexible rubber or silicone perimeter gasket surrounding the filter frame. If the sealing rubber has hardened, cracked, or deformed from high engine bay heat, unfiltered ambient air can leak directly past the edges. This bypass condition, known among mechanics as dusting, allows harmful abrasive grit straight into the intake plenum regardless of how clean the center paper appears.
Step-by-Step DIY Guide to Replacing an Engine Air Filter
Performing an engine air filter replacement is one of the simplest DIY maintenance tasks on any vehicle, typically requiring ten minutes and minimal tools. First, park the vehicle on level ground, shut off the ignition, and prop open the hood securely. Locate the black plastic airbox, which is usually positioned near the front corner of the engine bay and connects directly to the throttle body via a large corrugated rubber intake tube.
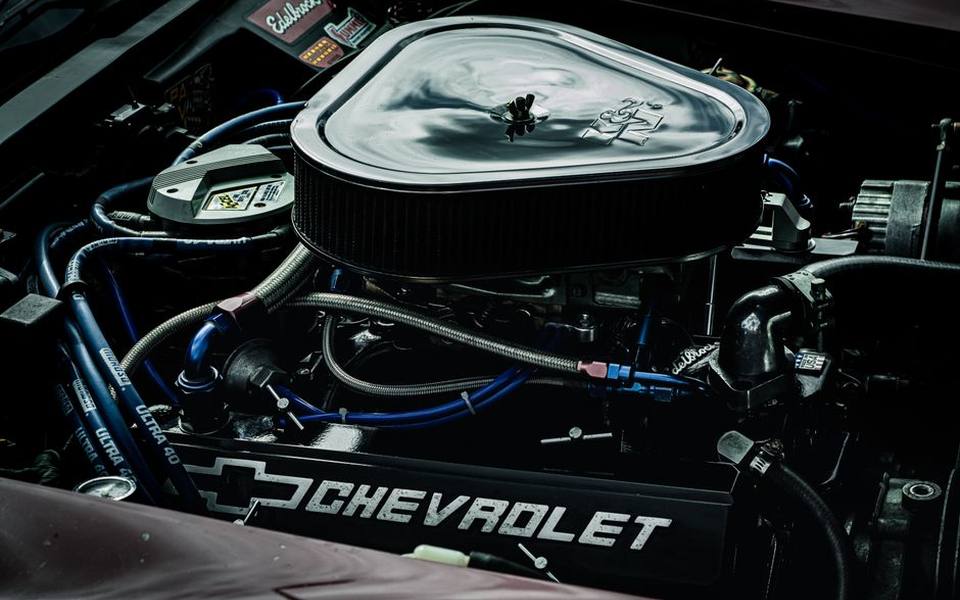
Most air filter housings are secured with two to four metal spring clips that snap open by hand, though some European and domestic trucks utilize small hex screws. Unlatch the fasteners and gently lift the upper lid of the housing just high enough to slide the old filter element out. Pay close attention to which way the pleats face and take a moment to clear out loose grit, leaves, or acorns from the bottom box.
Drivers often stop by car washes with free vacuums to suction loose dirt from the bottom of the open airbox before installing the replacement. Slide the new filter into the housing, ensuring the rubber sealing flange seats evenly inside the perimeter groove without pinching. Lower the lid back into position, re-engage all retaining clips, and verify that the intake duct remains firmly attached with no gaps.
How to Replace a Cabin Air Filter at Home
Learning how to replace cabin filter units at home eliminates high dealership labor fees and takes about fifteen minutes on most modern passenger sedans and crossovers. In roughly eighty percent of contemporary vehicles, the housing sits directly behind the passenger-side glove compartment. Empty the contents of your glove box, then look for the damper arm or flexible stoppers on the interior sidewalls that keep the door from dropping fully.
Gently press the side tabs inward to allow the glove box assembly to swing downward past its normal stops, exposing the climate control module. Behind the glove door, you will see a slender rectangular plastic cover secured with pinch clips on the sides. Unclip this access door to reveal the edge of the filter element, then carefully slide the old frame straight outward without dumping accumulated leaves and dust into your interior blower wheel.
Before sliding in the replacement cabin air filter, inspect the printed airflow indicator on the edge of the new frame. Cabin air generally flows from top to bottom through the housing, so the printed arrows must point downward in the direction of blower airflow. Align the new cartridge smoothly into the rails, snap the access door back into place, reattach the glove box damper cord, and test your dashboard fan on high speed.
Understanding Filter Media: Standard Paper, HEPA, and Carbon
When purchasing replacement parts, you will encounter several distinct grades of filtration media engineered for different driving environments. The most common option is standard cellulose or pleated synthetic paper, which provides excellent particulate capture at an economical price point. These basic filters catch roadside grit and coarse plant material effectively, making them a solid choice for ordinary suburban commuting without specialized filtration demands.
For cabin use, activated carbon filters represent a worthwhile upgrade for drivers in congested metropolitan areas. These elements incorporate a layer of treated charcoal particles between the fiber sheets, allowing them to adsorb noxious odors, diesel exhaust fumes, and volatile organic compounds before they penetrate the cabin. While they look naturally gray or speckled right out of the box, their chemical adsorption properties dramatically improve breathing comfort in stop-and-go traffic.
True HEPA filters offer the highest level of particulate efficiency, capturing airborne particles down to microscopic fractions of a micron. These high-density filters are beneficial for drivers with severe seasonal pollen allergies or those living in wildfire-prone corridors. However, their dense weave produces slightly more airflow resistance, which means your HVAC fan may need to run one speed setting higher to achieve identical cabin airflow compared to a standard paper unit.
The Real Cost of Filter Replacement: DIY vs Shop Service
Understanding replace cabin air filter cost dynamics helps car owners make informed decisions about routine vehicle upkeep. If you hire a franchised dealership or quick-lube facility, the total bill for changing cabin air filter units typically lands between forty and eighty dollars, while engine filter replacement often commands a similar sum. The bulk of that invoice represents labor markup and dealership facility fees rather than the actual price of the physical cartridge.
Purchasing the parts yourself through an auto supply retailer or verified online supplier typically costs between fifteen and thirty dollars per filter depending on whether you choose standard paper or premium activated charcoal. Doing the replacement on your driveway means both filters can be refreshed together for less than the cost of having a single unit serviced at a commercial repair shop, keeping cash in your wallet.
Some car models feature complicated filter access that justifies paying a professional technician for the job. For instance, certain older compact cars require removing the accelerator pedal assembly or disassembling wiper cowls beneath the hood to access the climate housing. In those specific scenarios, paying for professional labor saves you from frustrating dashboard disassembly and broken plastic fasteners.
Combining Filter Changes with Regular Vehicle Maintenance
Coordinating your filter inspections with a broader car care regimen ensures you never overlook either component. Many drivers coordinate filter checks with seasonal transitions, such as early spring before heavy tree pollination begins and late autumn before winter defrosters become essential. This seasonal cadence ensures your ventilation system is prepared to handle high humidity, road salt dust, and sub-freezing windshield conditions.
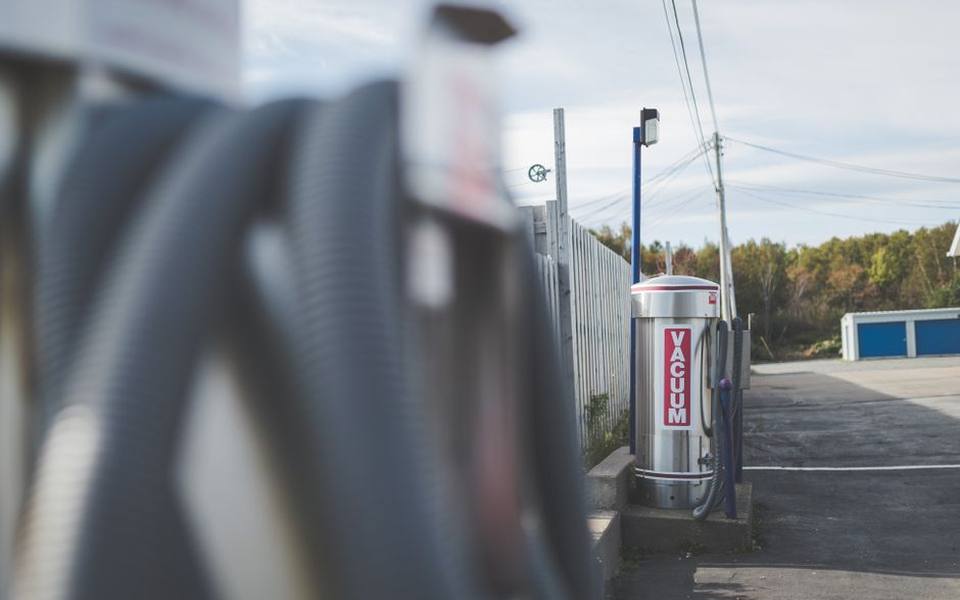
It also pays to combine filter maintenance with thorough exterior and interior cleanups. After changing your intake filter, visiting self-service car washes allows you to rinse exterior cowl screens and radiator fins of bug buildup and dried leaves. Keeping the exterior wiper cowl clear of organic debris prevents moisture and rotting compost from dropping directly onto your new cabin element beneath the glass.
For complete vehicle care, pairing fresh filtration with services from professional auto and car detailing shops keeps your vehicle looking pristine while breathing fresh. Clean ductwork, vacuumed carpets, and sanitized upholstery work in harmony with a fresh cabin filter to maintain a healthy driving environment, while a clean engine intake safeguards powertrain longevity for thousands of trouble-free miles.
Published 2026-09-21 · reviewed with each rebuild, last October 2026.
Find car washes near you
The directory lists 29,234 car washes by state and city — pick your state or use the “Near me” button in the header.
More guides
-
 Money
MoneyCar Detailing Cost Guide: Average Prices and Packages
-
 Service
How to Remove Window Tint and Car Wraps: DIY Methods and Costs
-
 Service
Headlight Restoration Guide: Cleaning Methods and Repair Costs
-
 Buying
Choosing the Best Detailing Vacuums, Steamers, and Washers
-
 Service
How to Buff and Polish Car Paint: DIY Exterior Detailing Guide
-
 Owning
Best Car Detailing Products: Waxes, Sealants, and Clay Bars
-
 Service
Interior Car Detailing: How to Clean Seats, Carpets, and Remove Odors
-
 Service
Car Scratch Removal Guide: DIY Fixes versus Body Shop Costs
-
 Service
Complete Guide to Self-Serve and Automatic Drive-Thru Car Wash Services
-
 Service
Professional Auto Detailing: Interior Deep Cleaning and Mobile Wash Guide
-
 Service
Car Scratch Repair, Paint Correction, and Buffing Techniques
-
 Owning
Complete Car Interior Detailing Guide: Carpet, Leather, and Dashboard Cleaning
-
 Service
Automotive Glass Cleaning, Water Spot Removal, and Windshield Repair
-
 Service
Automotive Ceramic Coatings and Paint Sealants: Costs, Products, and Application
-
 Service
Headlight Restoration and Cleaning: Toothpaste Hacks, Polish, and UV Sealants