Determining Scratch Depth and Clear Coat Anatomy
Most minor scratches on modern cars only sit in the clear coat, meaning you can often restore the panel at home without a full repaint. Modern automotive finishes consist of the sheet metal panel, primer, color base coat, and a durable clear coat on top. To determine how to handle the blemish, detailers rely on the standard fingernail test: gently glide your nail across the mark. If your nail glides past without catching, the damage is strictly within the clear coat and can be polished away. If it catches firmly, the defect penetrates down to the colored base coat or primer.
Understanding the thickness of your vehicle's factory clear coat puts the repair process in perspective. Modern automotive clear coat is remarkably thin, typically measuring about the thickness of a standard plastic sandwich bag or sticky note. When you attempt to remove a blemish, you are essentially leveling the surrounding clear coat flat with the lowest point of the groove. If you cut down too aggressively into the finish, you risk burning through the clear layer entirely, which permanently exposes the base coat to oxidation and peeling.
Scratches that show a bright white line on a dark car might look severe, but that white appearance is often just light refracting off fractured clear coat edges. Spraying a light mist of water or rubbing a little isopropyl alcohol over the spot provides quick clarification. If the scratch temporarily disappears while wet, clear coat leveling will almost certainly eliminate it. However, if you see gray primer, raw black plastic on a bumper, or bare steel, compounding alone will not solve the issue, as new pigment must be reintroduced.
Dealing with Surface Scuffs and Paint Transfer
Many cosmetic flaws that look like devastating gouges are actually surface scuffs caused by bumper-to-bumper nudges, rubber bollards, or plastic trash cans. In these scenarios, the impact often deposits foreign material onto your vehicle's clear coat rather than stripping the paint away. This is known as paint transfer or rubber scuffing. Before you purchase heavy compounds or consider sanding down your vehicle, you should inspect whether the defect is raised above the clear coat surface rather than carved into it.
To address a harmless paint scuff, begin by washing and drying the panel thoroughly to remove loose road grit that could cause secondary swirl marks. A basic detailing clay bar with plenty of dedicated lubricant will lift a surprising amount of embedded foreign material without touching the underlying clear coat. If rubber marks or stubborn paint transfer linger, applying a small amount of mild solvent or rubbing alcohol on a microfiber towel usually softens and dissolves the foreign pigment safely.
Once the transferred pigment is stripped away, you will often find that the vehicle's factory paint beneath remains virtually intact, aside from faint micro-marring. A light pass with a hand finishing polish will then restore the gloss and blend the contact area into the surrounding sheet metal. Cleaning off surface transfer before attempting any cutting technique ensures you do not grind external plastic or rubber particles deeper into your factory finish.
Choosing the Right Automotive Scratch Remover Formulations
Walking through the automotive care aisle reveals dozens of bottles labeled as scratch removers, rubbing compounds, and finishing polishes. These products generally fall into two categories: abrasive leveling liquids and cosmetic glazes filled with masking agents. Inexpensive filler polishes use heavy oils and silicones to temporarily hide light swirls by filling the micro-crevices, but the scratches inevitably return after a couple of rainfall cycles or drive-through car washes. Genuine correction demands a quality product formulated with diminishing or microscopic abrasives.
Diminishing abrasives break down into progressively finer particles as you work them into the paint under friction, starting with a moderate cut and finishing with a high-gloss sheen. Modern non-diminishing abrasive formulations, commonly called micro-abrasive technology, maintain a consistent cutting size that levels imperfections predictably without leaving behind heavy hazing. For an everyday DIY project, a dedicated liquid compound rated for light to medium defect removal offers far more control and safety than gritty, paste-style rubbing compounds found in older hardware formulas.
Always match the chemical aggressiveness of your remover to the hardness of your vehicle's specific clear coat. German brands are widely known for relatively hard ceramic clear coats that require firmer abrasive action, whereas Japanese makes frequently feature softer clears that correct easily but mar if subjected to aggressive grits. Testing a mild polish on an inconspicuous lower rocker panel gives you a baseline for how your specific clear coat reacts before working on prominent body panels.
Hand Application Versus Machine Polishing
Removing moderate defects by hand is physically demanding and inherently limited in its effectiveness. When working with hand pads, your fingers naturally concentrate pressure in uneven focal points, which can leave subtle unevenness or fail to generate the consistent heat needed to break down abrasive compounds. Hand polishing works adequately for tight recesses behind door handles, mirror caps, and narrow pillar trim, but correcting an entire door panel or hood by hand quickly leads to fatigue and inconsistent results across the surface.
For wider panels, a dual-action orbital polisher is the standard tool favored by both experienced enthusiasts and detailers. Unlike direct-drive rotary buffers that spin on a single fixed axis, a dual-action machine spins and oscillates simultaneously in an eccentric pattern. This random orbital motion disperses frictional heat across a wider surface area and drastically reduces the risk of burning through thin paint along panel body lines or sharp fender creases.
Before turning any machine polisher on, preparing the work area is mandatory. Working in direct sunlight causes polishing compounds to dry out almost instantly, resulting in intense dusting and unwanted pad friction. Always work in a shaded garage or well-ventilated bay, taping off unpainted plastic trim, rubber window seals, and adjacent sharp body seams with automotive masking tape. Using dedicated self-serve wash bays beforehand provides a controlled environment to strip away dirt, grease, and road salt before taking an abrasive pad to your clear coat.
Machine Buffing Techniques and Paint Correction Stages
Professional paint correction is typically executed in multi-stage sequences depending on how deep the clear coat damage runs. A standard single-stage correction uses a medium polishing pad combined with an all-in-one compound to clear up light swirls, wash scuffs, and haze while restoring gloss. This approach generally removes roughly half to two-thirds of surface defects without shaving away substantial clear coat, making it ideal for daily drivers where preserving paint thickness for the long haul is the primary priority.
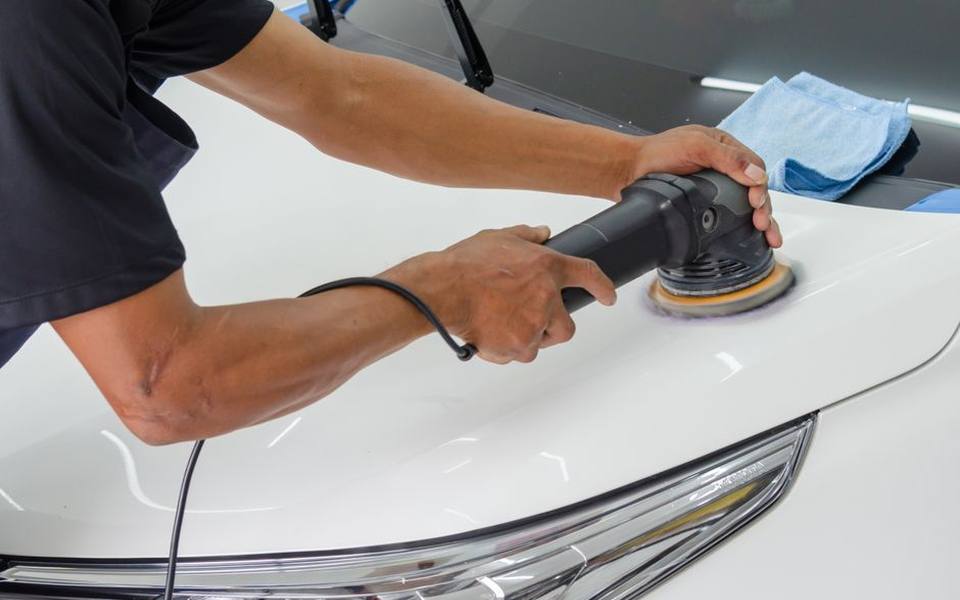
For deeper scratches that do not fully penetrate the color coat, a two-stage correction is standard practice. The first cutting stage employs a firm foam or microfiber cutting pad paired with a heavy-cut compound to level the sharp shoulders of deeper ruts. Because heavy cutting leaves behind a faint milky haze or micro-marring on darker paint finishes, a second refining stage is mandatory. This second pass uses a soft finishing pad and fine polish to restore deep optical clarity and high reflection.
Mastering machine technique requires slow, overlapping arm movements and consistent downward pressure. Divide large panels into manageable two-by-two-foot working squares rather than tackling an entire hood in one continuous sweep. Move the polisher at a deliberate pace of roughly one inch per second, overlapping each successive pass by fifty percent in an alternating cross-hatch pattern. Check your work frequently with a specialized high-intensity inspection light or clean LED flashlight to evaluate true defect removal rather than just surface oil coverage.
Touch-Up Paint for Deep Scratches Through the Primer
When a scratch cuts through the clear coat into the color coat, primer, or bare metal, abrasive compounding cannot fix the problem because there is simply no pigment left to level. In these deeper instances, introducing new factory-matched base coat and clear coat is the only way to seal the bare metal against corrosion and disguise the damage. Every vehicle has an exact exterior paint code stamped on the driver-side door jamb label or beneath the hood, which you must use when purchasing touch-up kits.
The most common mistake car owners make with touch-up paint is using the broad brush applicator supplied inside the bottle cap. These brushes deposit far too much paint, creating unsightly raised blobs that look worse than the original scratch. Instead, clean the channel using isopropyl alcohol, and apply microscopic drops of paint with a fine micro-dabber or the tip of a wooden toothpick. Build the color base coat in thin, layered steps, allowing each layer to dry completely before applying the next.
After building up the base coat to sit slightly below the surrounding factory surface, seal the repair with a dab of automotive clear coat. To make the repair truly invisible, allow the clear coat to cure for several days, then wet-sand the raised ridge flush with two-thousand to three-thousand-grit sandpaper wrapped around a firm sanding block. Once the touched-up ridge is flush with the original panel, polish out the fine sanding marks using your compound and dual-action buffer.
Where Paintless Body Repair and Blend Work Fit In
Vehicle scratches often coincide with small parking lot dings or creases where another car door struck the panel. In situations where the sheet metal is deformed but the surrounding paint has not cracked, technicians utilize paintless body repair methods, commonly referred to as paintless dent repair or PDR. Highly trained technicians access the backside of the outer sheet metal through access holes or window cavities, meticulously massaging out low spots and high ridges using specialized metal rods and reflective lighting boards.
Combining paintless metal realignment with meticulous surface polishing often saves vehicle owners from having an entire door or quarter panel resprayed. If a door impact left a shallow dent alongside a white rub mark, a technician can often raise the dent completely and then machine-polish the surface transfer away in a single appointment. This preserves your factory-applied electrocoat and original robotic paint finish, which always maintains higher corrosion resistance and resale value compared to secondary aftermarket resprays.
However, if the metal crease has stretched the sheet metal past its elastic limit or the impact fractured the clear coat down to raw steel, paintless methods alone cannot produce an invisible repair. Once the paint matrix breaks or flakes away along a crease, attempting to massage the metal from behind will often cause further paint delamination. In those severe structural cases, panel beating, filling, and conventional spray refinishing become necessary to protect the bare metal against moisture.
Professional Detailing Versus Traditional Body Shop Resprays
Deciding whether to take your vehicle to a specialized detailing studio or a collision body shop depends entirely on the severity of the damage. Professional detailers excel at defect removal, multi-stage machine compounding, localized wet sanding, and paint protection coatings. If the scratches are confined to the upper clear coat or require minor touch-up blending across a small area, scheduling full car detailing services will almost always produce outstanding aesthetic results at a fraction of collision shop prices.
Collision centers and auto body shops, by contrast, focus on structural repairs, panel replacements, and full-panel repainting. A body shop rarely spends six hours wet sanding and compounding individual surface marks; instead, their standard procedure is to sand down the entire damaged panel, feather out the gouges, spray fresh base color, and shoot new clear coat across the entire component from seam to seam. For deep, widespread key scratches spanning multiple doors, a body shop respray is frequently the only path to a factory-fresh finish.
Choosing between these options also affects your vehicle's history report and paint consistency. A full-panel respray requires blending pigment into adjacent fenders and doors to prevent noticeable shade mismatches, particularly with modern metallic and pearl finishes. On newer vehicles or lease returns, attempting correction through full-service auto detailing preserves the original factory panels and prevents insurance claims from depreciating the car's documented market value.
Cost Expectations for DIY and Professional Correction
Budgeting for scratch repair depends on whether you tackle the project in your own garage or hand the keys over to a professional. A comprehensive DIY setup—including a reliable dual-action polisher, backing plates, cutting and finishing foam pads, compound, polish, and microfiber towels—typically costs between one hundred fifty and three hundred dollars as an upfront investment. If you already own an orbital polisher, simple replenishment bottles of compound, touch-up pigment, and sanding paper typically run under fifty dollars.
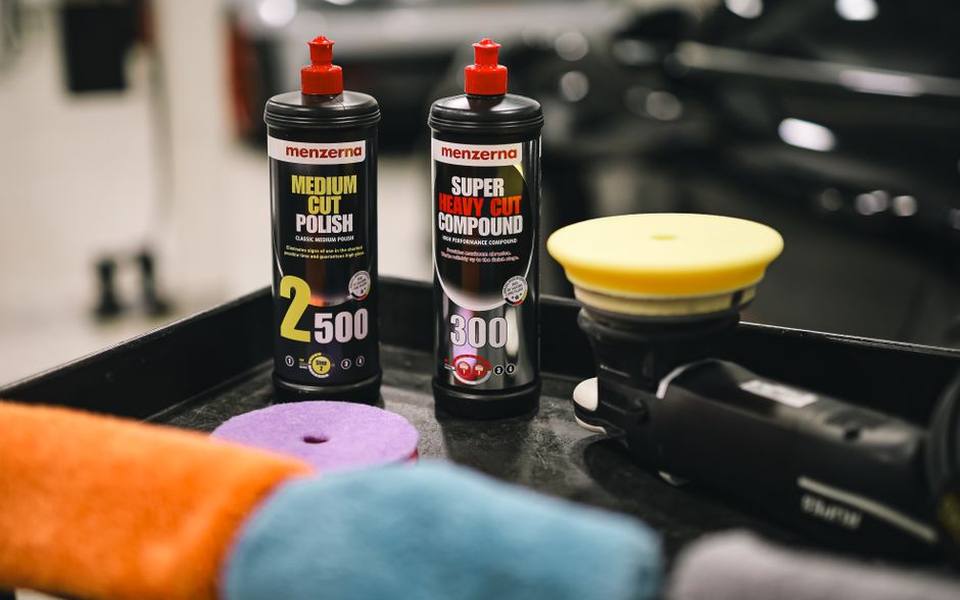
For professional detailing, prices depend on vehicle size, paint hardness, and the correction level required. A single-stage buff and polish that removes light swirls and scuffs typically ranges from two hundred fifty to five hundred dollars across most regions. Full multi-stage paint correction aimed at removing eighty to ninety percent of deeper clear coat defects typically commands six hundred to twelve hundred dollars, reflecting the ten to twenty hours of intensive labor required.
When scratches penetrate into the primer or bare steel, requiring conventional body shop refinishing, costs rise significantly. Respraying a single bumper cover or door panel typically runs between five hundred and one thousand dollars in most states, with tri-coat pearl paints or luxury models commanding higher labor rates. Comparing shop estimates and reviewing detailing portfolios beforehand ensures you choose a repair strategy that aligns with your vehicle's age and overall market value.
Preventing Future Scratches and Preserving the Finish
After investing time or money into perfecting your vehicle's paint, adopting safe maintenance habits is essential to keep scratches and swirl marks from reappearing. The vast majority of vehicle scratches are not caused by road gravel or malicious vandalism, but by improper washing techniques that drag abrasive grit across the clear coat. Avoid automatic tunnel washes that utilize heavy rotating cloth curtains or abrasive spinning bristles, as these brushes frequently collect debris from previous muddy trucks.
Instead, switch to a two-bucket hand washing system equipped with grit guards at the bottom of each bucket to isolate settled dirt from your wash mitt. Alternatively, running your car through modern touchless wash facilities relies strictly on pressurized water streams and specialized detergents, eliminating physical brush contact altogether. Always use plush, clean microfiber wash mitts, working from the cleanest top sections of the vehicle down toward the road-grimed lower rocker panels.
Drying technique is equally vital for scratch prevention. Never use stiff bath towels, squeegees, or old cotton rags to dry automotive paint, as coarse fibers easily scour softened clear coat. Use a dedicated high-pile microfiber drying towel paired with a slick spray detailer as a drying aid, or use a filtered leaf blower to dry crevices contact-free. Applying a long-lasting ceramic coating or synthetic paint sealant afterwards creates a slick, hydrophobic barrier that significantly resists environmental fallout and light wash-induced marring.
Published 2026-09-21 · reviewed with each rebuild, last October 2026.
Find car washes near you
The directory lists 29,234 car washes by state and city — pick your state or use the “Near me” button in the header.
More guides
-
 Money
MoneyCar Detailing Cost Guide: Average Prices and Packages
-
 Service
How to Remove Window Tint and Car Wraps: DIY Methods and Costs
-
 Service
Headlight Restoration Guide: Cleaning Methods and Repair Costs
-
 Buying
Choosing the Best Detailing Vacuums, Steamers, and Washers
-
 Service
How to Buff and Polish Car Paint: DIY Exterior Detailing Guide
-
 Owning
Best Car Detailing Products: Waxes, Sealants, and Clay Bars
-
 Service
Interior Car Detailing: How to Clean Seats, Carpets, and Remove Odors
-
 Service
Car Scratch Removal Guide: DIY Fixes versus Body Shop Costs
-
 Service
Complete Guide to Self-Serve and Automatic Drive-Thru Car Wash Services
-
 Service
Professional Auto Detailing: Interior Deep Cleaning and Mobile Wash Guide
-
 Service
Vehicle Air Filter Replacement: Cabin vs Engine Air Filters
-
 Owning
Complete Car Interior Detailing Guide: Carpet, Leather, and Dashboard Cleaning
-
 Service
Automotive Glass Cleaning, Water Spot Removal, and Windshield Repair
-
 Service
Automotive Ceramic Coatings and Paint Sealants: Costs, Products, and Application
-
 Service
Headlight Restoration and Cleaning: Toothpaste Hacks, Polish, and UV Sealants